
Your first session
Record a guitar through the NAM Rack, add MIDI drums, mix it, render it.
One continuous session: a guitar part through the NAM Rack, a MIDI drum part, two edits, a quick mix, and a rendered file. It assumes you have finished Getting started and can hear playback. Shortcuts are the OpenStudio default keyboard profile; Ctrl means Cmd on macOS.
Set the tempo and save
- Click the BPM field in the transport bar and type a tempo, or tap
Tin time with the song. Set the Time Signature beside it if the song is not in 4/4. - Click the metronome icon so you have a click to play to. The gear next to it sets the sound, accent pattern, and volume.
- Press
Ctrl+Sand choose a folder. Recorded WAV files go intoOpenStudio/Audioinside your Documents folder and are referenced by the project; saving does not copy them beside the.osproj. Keep those files with your backups.
Record guitar through the NAM Rack
The NAM Rack is the built-in guitar and bass workspace: Neural Amp Modeler A1/A2 captures, a pedalboard, a cabinet IR stage, and post effects, sitting in the track's FX chain so you hear the tone while you play.
- Press
Ctrl+Tfor an audio track. Pick the guitar input in the track header and set it to Mono. - Click FX on the track header, add OpenStudio NAM Rack, select the live instrument input inside the rack, and choose the Guitar or Bass profile.
- Load a local
.namfile, or connect TONE3000 and open a tone pack. In a multi-capture pack, click View Captures, pick the exact child, Audition it, then Use. - Check the topology badge. RAW / AMP ONLY needs a cabinet IR in the Cab stage; CAB EMBEDDED is a full rig and bypasses it.
- Set the input trim, then open the tuner and tune. It listens to the dry input and adds no latency.
- Click the record-arm circle and turn on Monitor. Aim for input peaks around −12 to −6 dB.
- Press
Ctrl+R, play, and pressSpaceto stop. The take lands as a clip at the playhead.
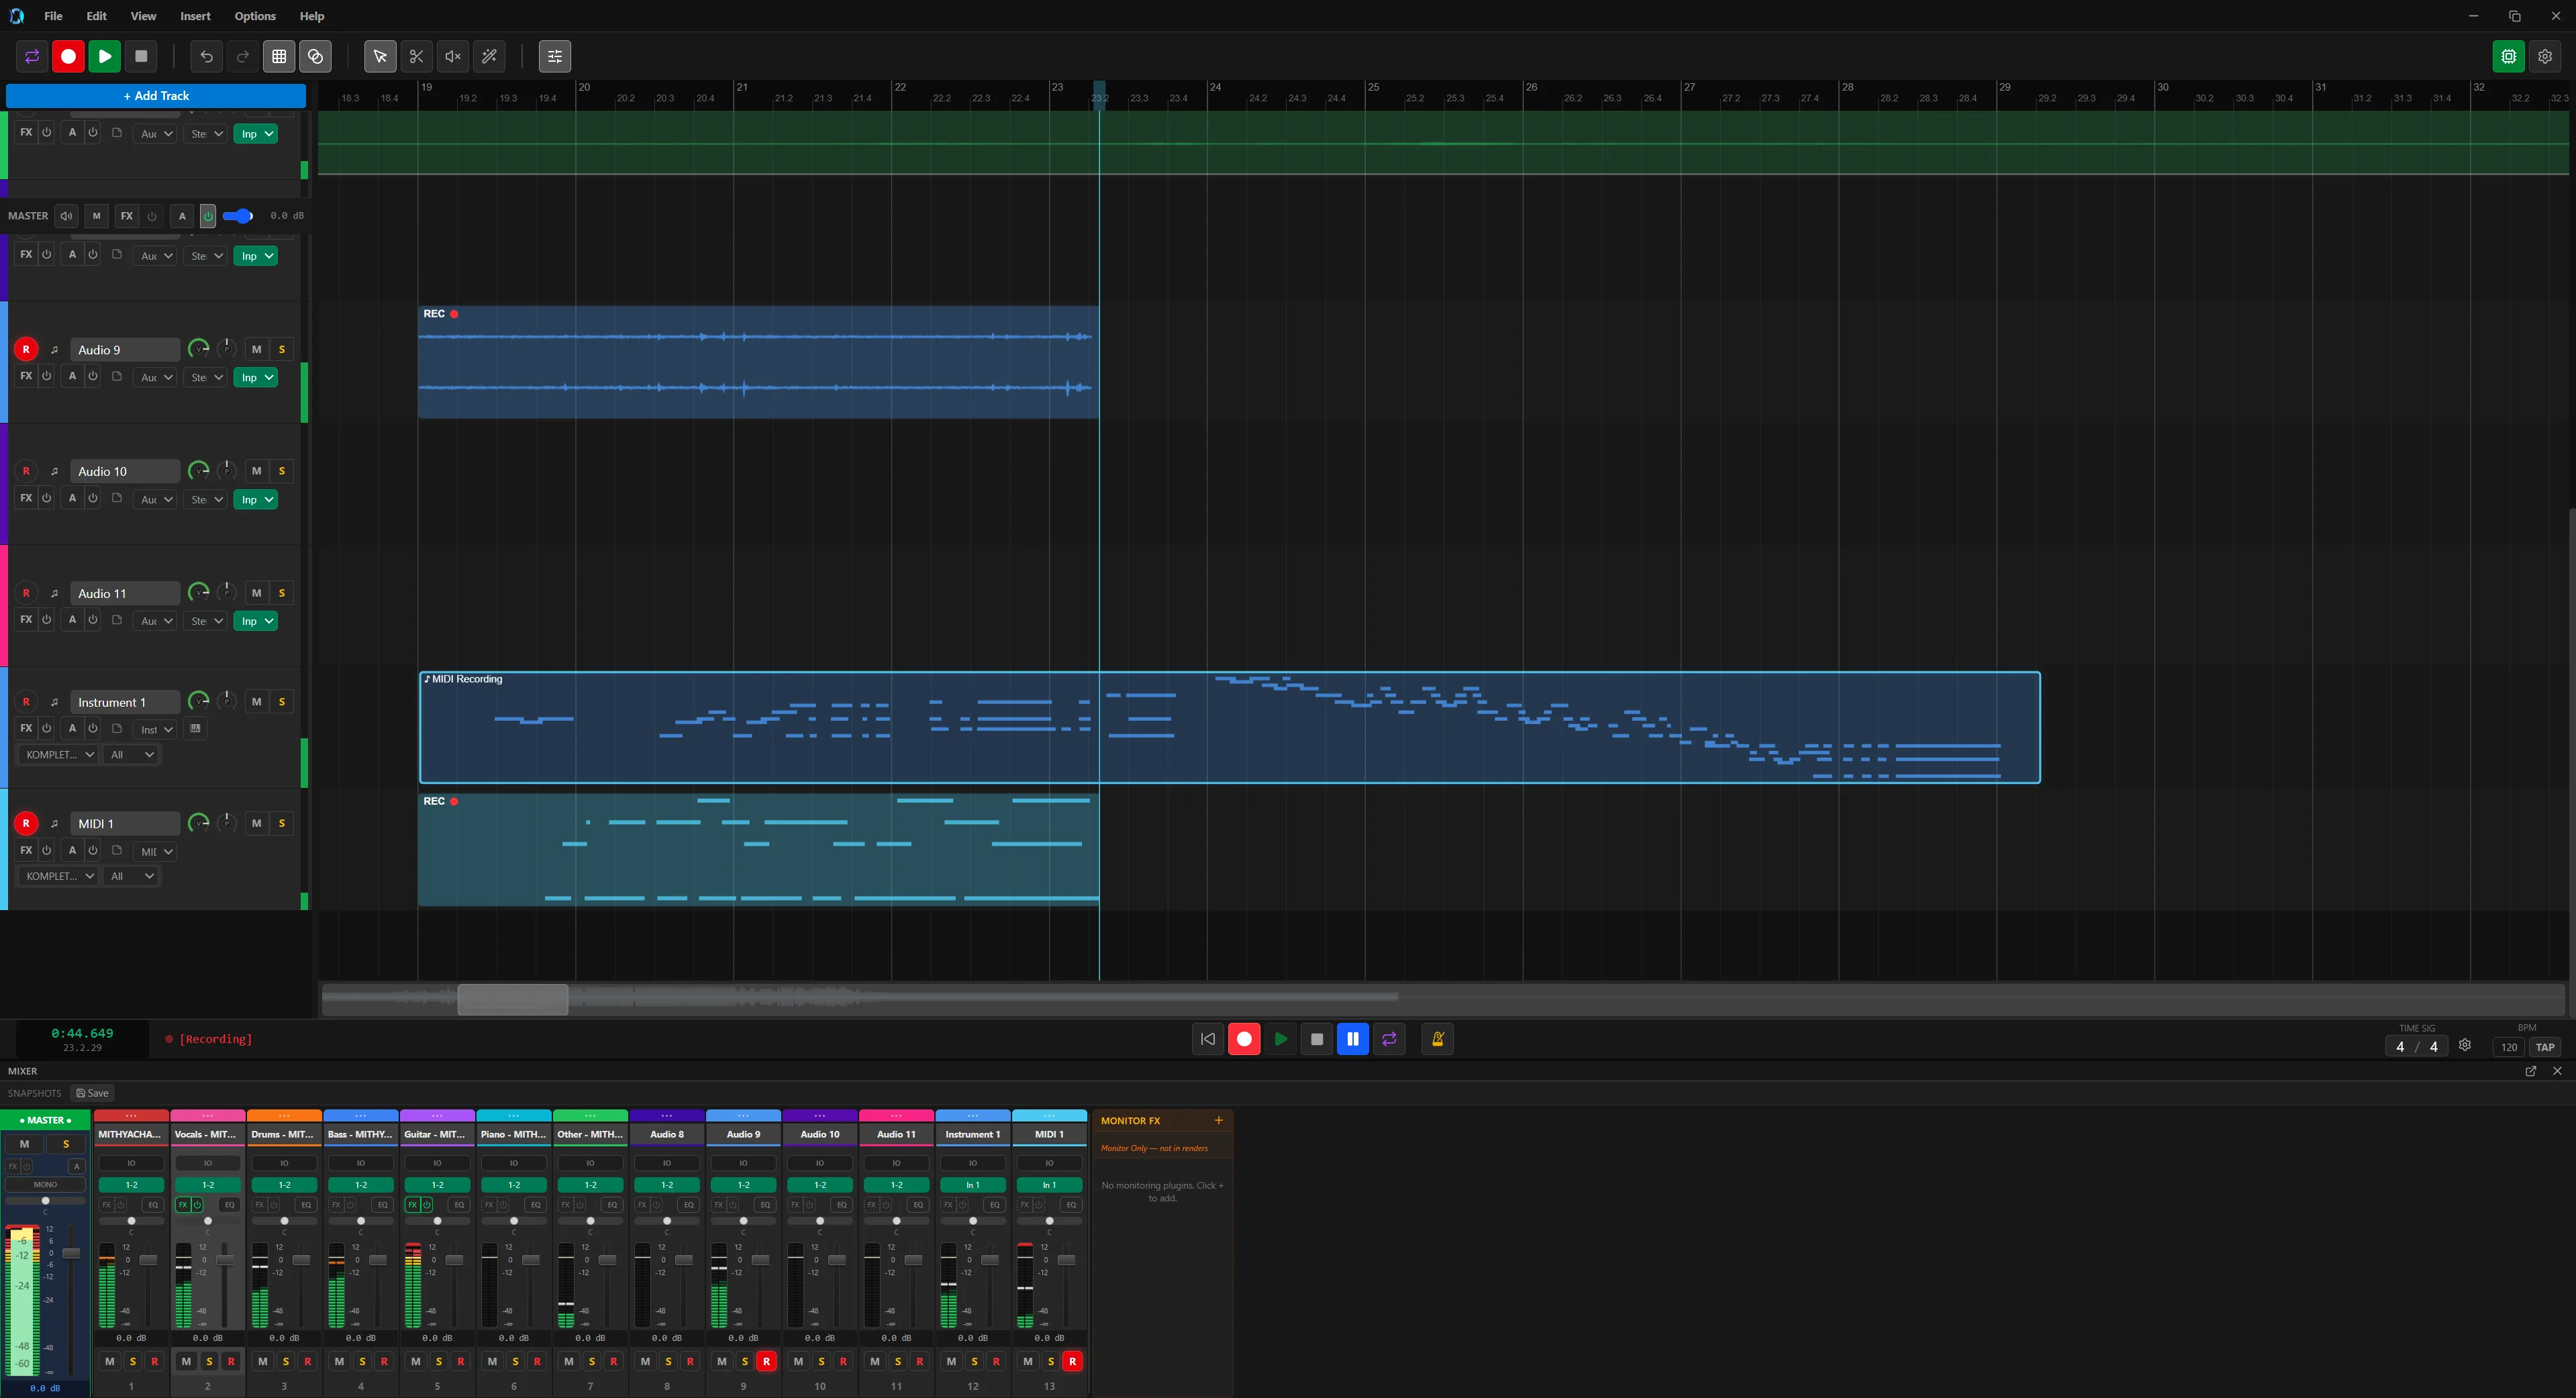
For takes, set a loop range, enable loop, and record several passes in one recording session. Overdub keeps existing clips when you record over them; it does not fold separate recording sessions into one take stack. Comping is in Recording & editing, the rack in NAM Rack setup.
OpenStudio ships no captures or IRs. Bring a local .nam file or sign in to TONE3000 where the build offers it (NAM Rack guide).
Add a MIDI drum part
- Press
Ctrl+Shift+Ifor an instrument track. The Plugin Browser opens; pick a VST3 drum instrument (click Scan first if the list is empty). - To play it in: choose your controller in the track header's MIDI input dropdown, arm, enable monitoring, press
Ctrl+R, and play. No controller?Alt+Bopens the on-screen keyboard. - To draw it: select the instrument track, choose Insert → Empty MIDI Clip, then double-click the clip to open the Piano Roll, choose the Draw tool, and click in the grid. Row is pitch, column is time; drag to set length.
- For a step-entered pattern, enable Step Input in the Piano Roll toolbar, pick a step size, and press
CthroughBto insert notes. - Tighten timing with MIDI → Quantize Notes…;
Qreapplies the same settings later. Drag bars in the velocity lane to set how hard each hit plays.
The Drum Editor action exists, but a mounted drum-grid editor is not in the current build. Use the Piano Roll for drum notes. More in MIDI & piano roll.
Tidy the take
Three edits cover most first sessions. All are non-destructive and undoable with Ctrl+Z; Ctrl+Alt+Z opens the undo history.
- Split. Select the clip, put the playhead where the mistake starts, press
S; repeat at the end and pressDeleteon the middle piece.Bswitches to the Split tool. - Trim. Hover a clip edge until the resize cursor appears and drag inward to hide the count-in, or outward to reveal audio you trimmed away.
- Fade. Hover the top-left or top-right corner and drag the handle inward. Auto-Crossfade in the main toolbar crossfades overlapping clips on one track automatically.
A quick mix with a bus and a snapshot
- Press
Ctrl+Mfor the mixer. Each strip has a fader (−60 to +12 dB), pan, a peak meter, and S, M, R buttons; double-click a fader for 0 dB. - Start with every fader at unity and pull down whatever is loudest first, watching the master meter on the left.
- Select the guitar and drum tracks and choose Insert → Create Bus from Selected Tracks. OpenStudio makes a bus with a send from each track.
- Click the bus's FX button and add OpenStudio Reverb. In each strip's sends area, set the level and pick pre- or post-fader.
- Click Save in the Mixer Snapshots toolbar and name it. Try another balance, save that too, and click either name to switch.

Sends, the routing matrix, and automation are in Mixing & routing.
Render the song
- Press
Ctrl+Alt+Ror open File → Render…. - Set Source to Master mix and Bounds to Entire project.
- Choose a folder and a file name;
$projectand$dateare replaced at render time. - Pick WAV and a bit depth. Add a Tail in milliseconds if the reverb rings past the last clip.
- Turn on Add to project after render if you want the bounce back on the timeline, then render. Add to Queue parks the job in View → Render Queue instead.
Those formats go through FFmpeg, bundled on Windows only. On macOS and Linux you need a system ffmpeg on your PATH. Stems, regions, and DDP are in Rendering & export.
Where next
- Audio setup if monitoring felt late or you heard crackle.
- Plugins & scanning if an instrument did not show up in the browser.
- Keyboard shortcuts to switch to a profile that matches the DAW you came from.
- Troubleshooting for anything that did not behave as described here.