
Recording & editing
Inputs, arming, monitoring, record modes, takes, and the timeline editing tools.
Audio recording from input to comped take, then the timeline tools in the order you are likely to reach for them. MIDI has its own page. Shortcuts are the OpenStudio default keyboard profile; Primary (and the Ctrl below) is Ctrl on Windows and Linux and Cmd on macOS.
Inputs, arming, and monitoring
- Confirm the device in View → Audio Settings…. Its channels are what the track input dropdown offers.
- On each track, pick the input in the track header and choose Stereo (a channel pair) or Mono (one channel).
- Click the red Record Arm circle. The transport's Record button stays disabled until at least one track is armed; arm several to record them together.
- Toggle Monitor to hear the live input through the track's input FX and track FX, at a delay set by your buffer size.
Buffer size, drivers, and the macOS microphone permission are in Audio setup.
Recording, record modes, and loops
- Position the playhead where recording should begin.
- Press
Ctrl+Ror the transport Record button. The status reads[Recording]. - Press
Spaceor Stop to finish; there is no separate stop key in the default profile. - The new clip appears on the armed track. Audio is written as WAV into
OpenStudio/Audioinside your Documents folder and referenced by the project.
Options → Record Mode decides what happens when you record over existing material. The mode shows as a transport badge whenever it is not Normal.
| Mode | Behaviour |
|---|---|
| Normal | Creates a new clip on the armed track. Existing clips are preserved. |
| Overdub (Layer) | Adds new clips while keeping the existing clips. Loop passes within one recording session are grouped as takes. |
| Replace | Removes existing audio clips that overlap the new recording. It does not trim and preserve their portions outside the recorded range. |
For loop recording, make a time selection and choose View → Set Loop to Selection, which also enables looping. Then arm and record. Looping is not punch recording; a separate punch control is not exposed in the current UI.
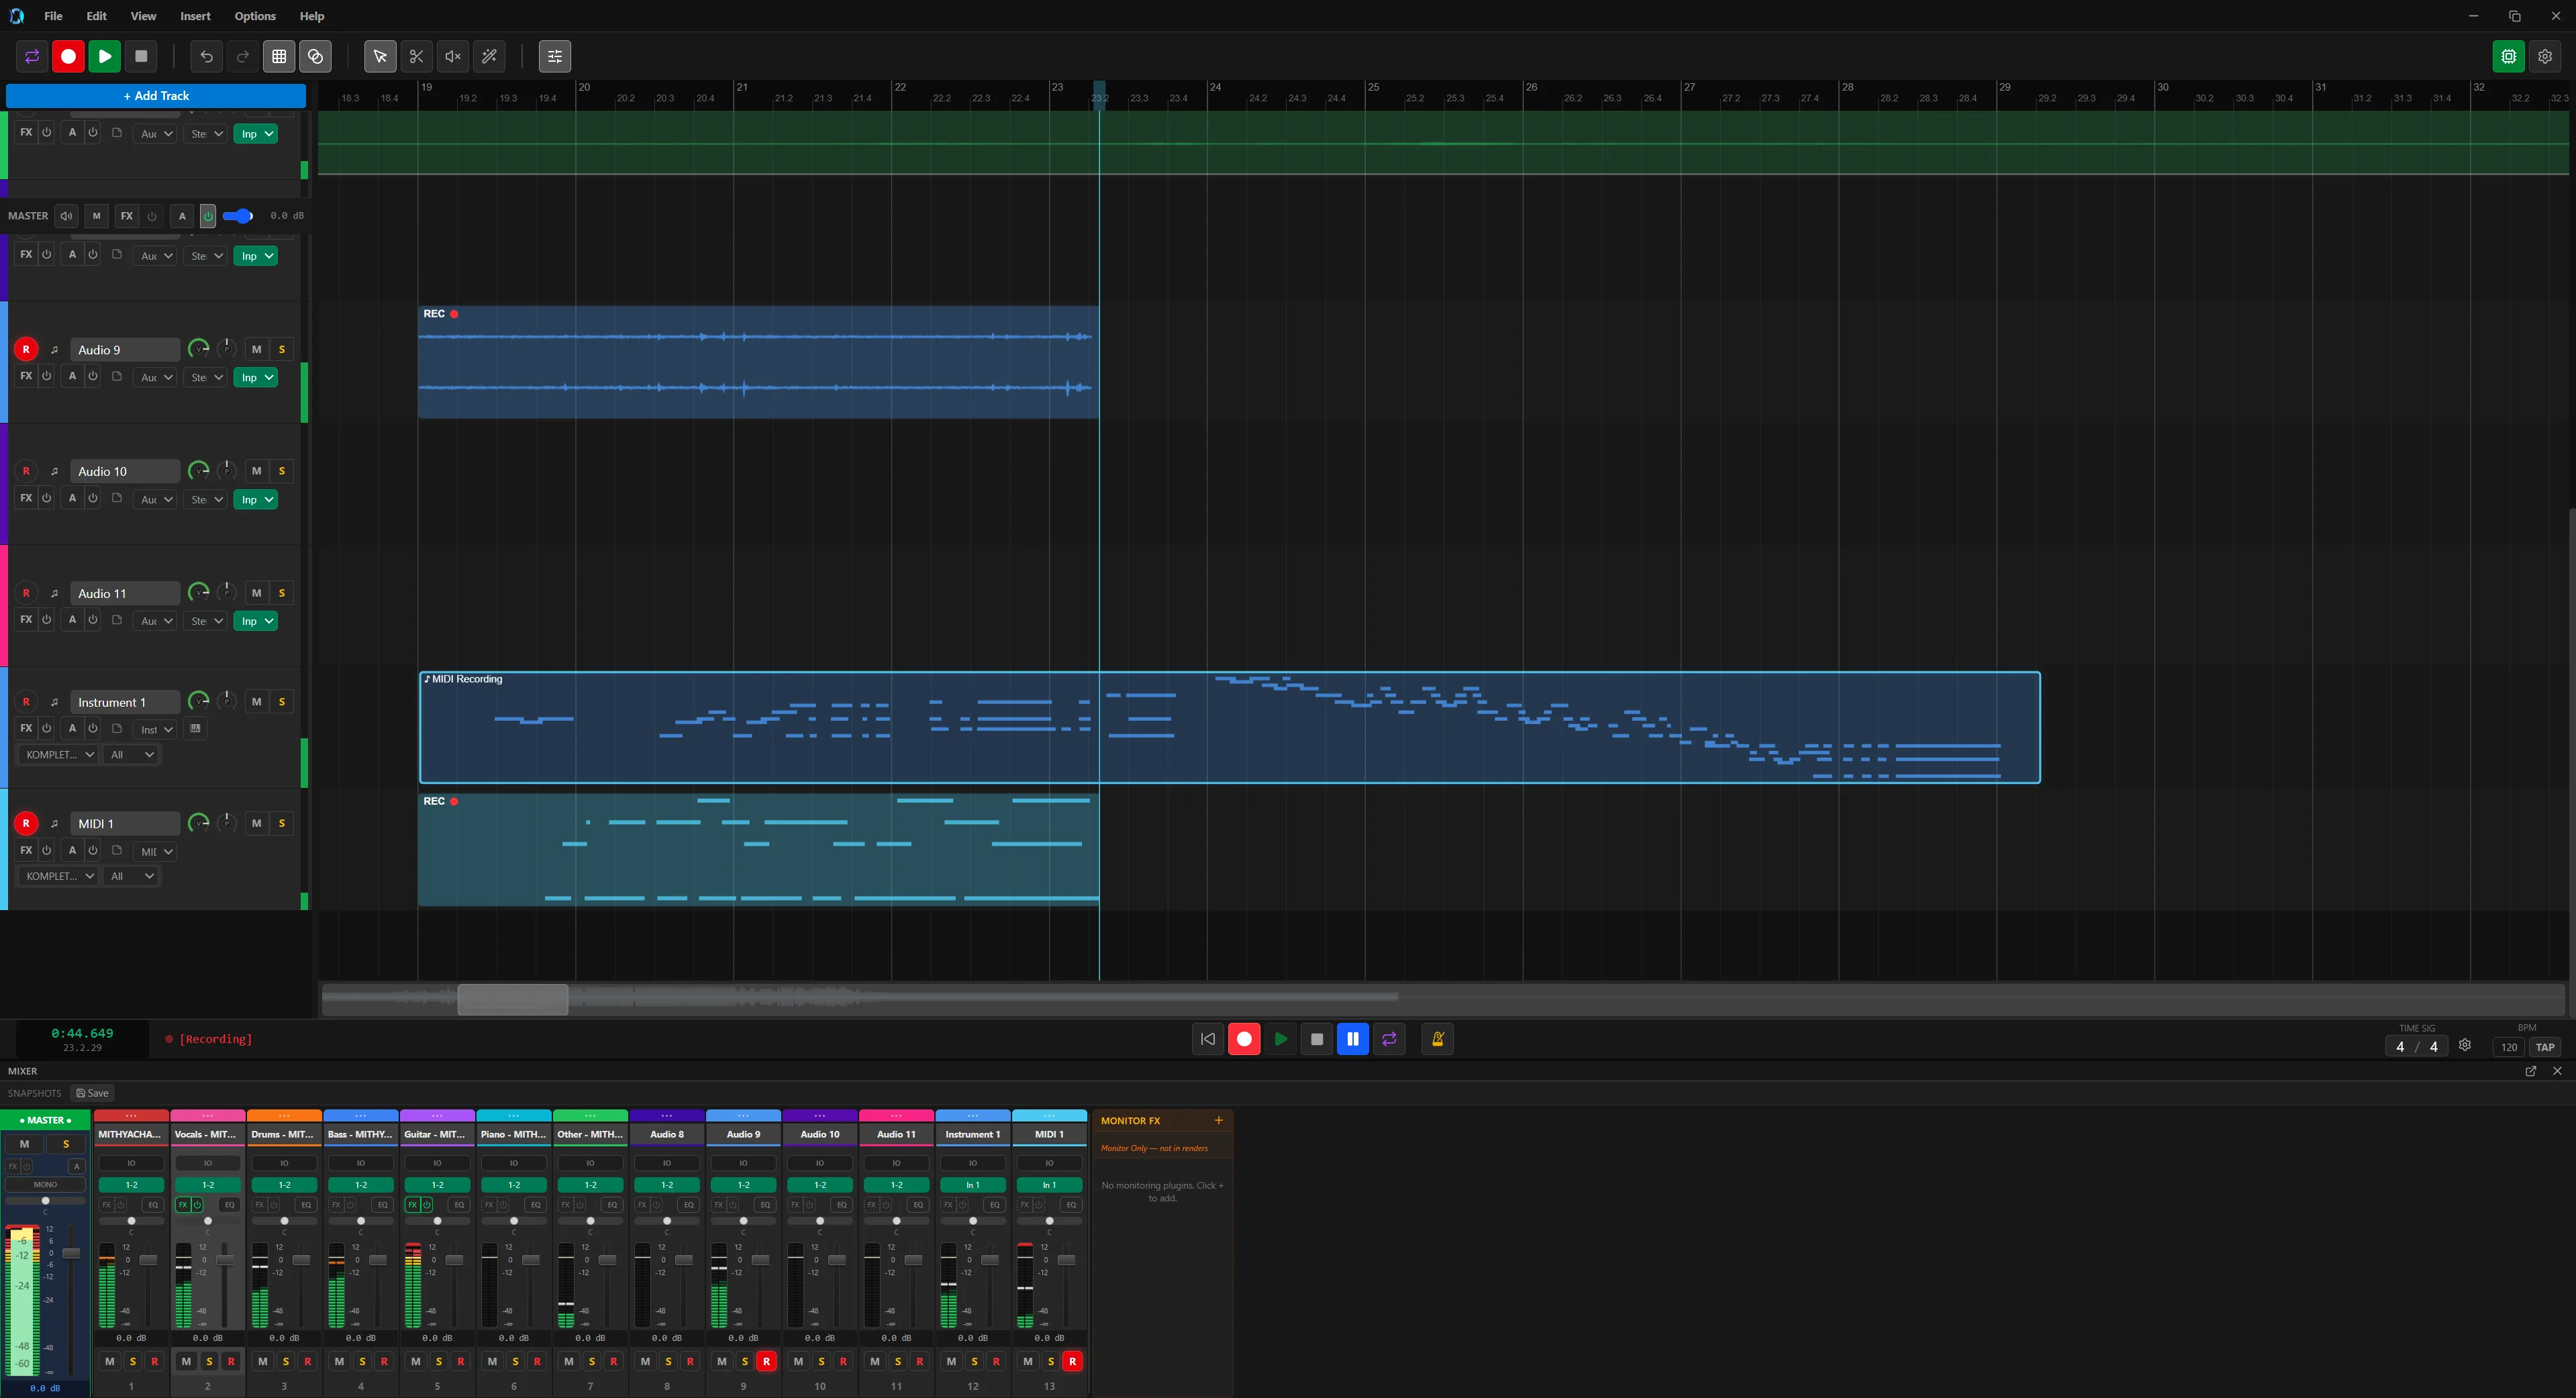
Takes and comping
Multiple loop passes within one recording session become takes on one clip. Only the active take plays; switch it from the clip's take menu.
- Record as many takes as you need over the section.
- Run Edit → Explode Takes to New Tracks to lay them out on separate tracks. Neither take command has a default key; both are in the Edit menu and Command Palette.
- Split or razor-edit the best pieces from each track.
- Select the pieces and run Edit → Implode Clips into Takes to fold them back into one clip.
Selection, moving, and nudging
- Click a clip to select it;
Primary+click adds or removes one. Drag on empty space to marquee-select.Ctrl+Shift+Aselects every clip,Escclears. - Click a track header to select the track;
Ctrl+Clickmulti-selects,Shift+Clickselects a range,Ctrl+Aselects all tracks. Primary+drag on the timeline background, orShift+drag on the ruler, makes a time selection. It drives render bounds and the operations below, and can be copied to the loop range.- Drag a clip to move it in time or to another track. Hold
Alt/Optionto bypass snap for one drag,Primaryto copy instead of move,Shiftto lock to the first axis you cross. Ctrl+X,Ctrl+C, andCtrl+Vcut, copy, and paste at the playhead. Multi-clip pastes keep their relative track positions.
| Action | Shortcut | Moves by |
|---|---|---|
| Nudge left | Left | One grid unit |
| Nudge right | Right | One grid unit |
| Nudge left fine | Ctrl+Left | A fine amount |
| Nudge right fine | Ctrl+Right | A fine amount |
Split, trim, slip, and fade
- Split at playhead: select a clip and press
S, or Edit → Split at Cursor.Bpicks the Split tool for click-to-cut. Edit → Split at Time Selection cuts every clip at both selection edges. - Trim: in the Select tool, hover a clip edge until the resize cursor appears and drag. Inward hides content, outward reveals it. The source file is untouched.
- Slip: hold
Primary+Shiftand drag inside a clip. The boundaries stay put while the audio slides within them. - Fades: hover the top-left or top-right corner for the handle and drag inward. Auto-Crossfade in the main toolbar or View menu crossfades overlapping clips on one track.
- Gain envelope:
Shift+click an audio clip to add a point, drag a point to move it, right-click to remove it.
All of it is undoable with Ctrl+Z and redoable with Ctrl+Shift+Z. View → Undo History (Ctrl+Alt+Z) lists every operation; click one to jump back to it.
Time selection, razor, and ripple
With a time selection active, the Edit menu offers Cut within Time Selection, Copy within Time Selection, Delete within Time Selection (later clips ripple earlier), Insert Silence (later clips push later), Split at Time Selection, and Set Loop to Selection (Ctrl+L).
Razor editing cuts a region out of several tracks at once. Hold Alt/Option and drag on the timeline background, then press Delete or Edit → Delete Razor Edit Content. Clear Razor Edits in the Command Palette dismisses the area without deleting.
Deleting razor content does not apply ripple mode in the current build. Close the gap with a time-selection delete or by moving the clips.
Ripple mode, set from Options → Ripple Editing or Preferences → Editing, decides whether later clips close a gap. The active mode shows in the transport bar as Ripple: Track or Ripple: All.
| Mode | Behaviour |
|---|---|
| Off | Clips stay where they are when content is deleted, leaving gaps. |
| Per Track | Later clips on the same track shift to fill the gap. |
| All Tracks | Later clips on every track shift to fill the gap. |
Clip properties, grouping, and transients
Utoggles clip mute. Edit → Toggle Clip Lock stops a clip being moved, resized, or deleted.F2opens Clip Properties, including per-clip volume in dB. Edit → Normalize Selected Clips raises the peak to 0 dB; Edit → Reverse Clip reverses the audio.Ctrl+Ggroups selected clips so they move and edit together;Ctrl+Shift+Gungroups.- Edit → Quantize Selected Clips to Grid snaps clip starts to the grid.
- Edit → Dynamic Split… splits a clip at transients or silence; set threshold and minimum duration in the dialog.
- With an audio clip selected,
Tabjumps the playhead to the next transient,Shift+Tabto the previous one.
Markers and regions
Press M to drop a marker at the playhead, or Shift+M to name it as you add it. For a region, make a time selection and press Shift+R (or Insert → Region from selection). Regions have a name, start, end, and colour, and double as render bounds.
View → Region/Marker Manager lists everything in time order with controls to rename, delete, and jump. Rendering by region is in Rendering & export.