
Getting started
Install, first launch, audio device, plugin scan, first project.
OpenStudio is a desktop DAW with a JUCE C++ audio engine and a React front end. This page takes you from the download to a saved project with one track on it. Budget about ten minutes.
Download and install
Grab the build for your platform from the download page. Signing and notarization depend on the build, so your OS may warn or block first launch. Follow the release notes for that download.
chmod +x OpenStudio-*.AppImage and launch it. MP3/OGG export and other FFmpeg-backed features use a system ffmpeg on your PATH.The first-launch approval path is documented, not warning-free. Compare the SHA-256 on the download page to check file integrity; a matching checksum does not guarantee OS approval.
On first launch OpenStudio creates its configuration files, scans your audio devices and drivers, and opens an empty project. Updates are announced in-app; you can also check manually from Help → Check for Updates….
First launch
Shortcuts below use the OpenStudio keyboard profile; Ctrl means Cmd on macOS. The layout follows the usual DAW pattern: menu bar and main toolbar on top, the track control panel on the left, the timeline in the centre, the mixer below when you toggle it with Ctrl+M, and the transport bar along the bottom with the time display, BPM, and time signature.
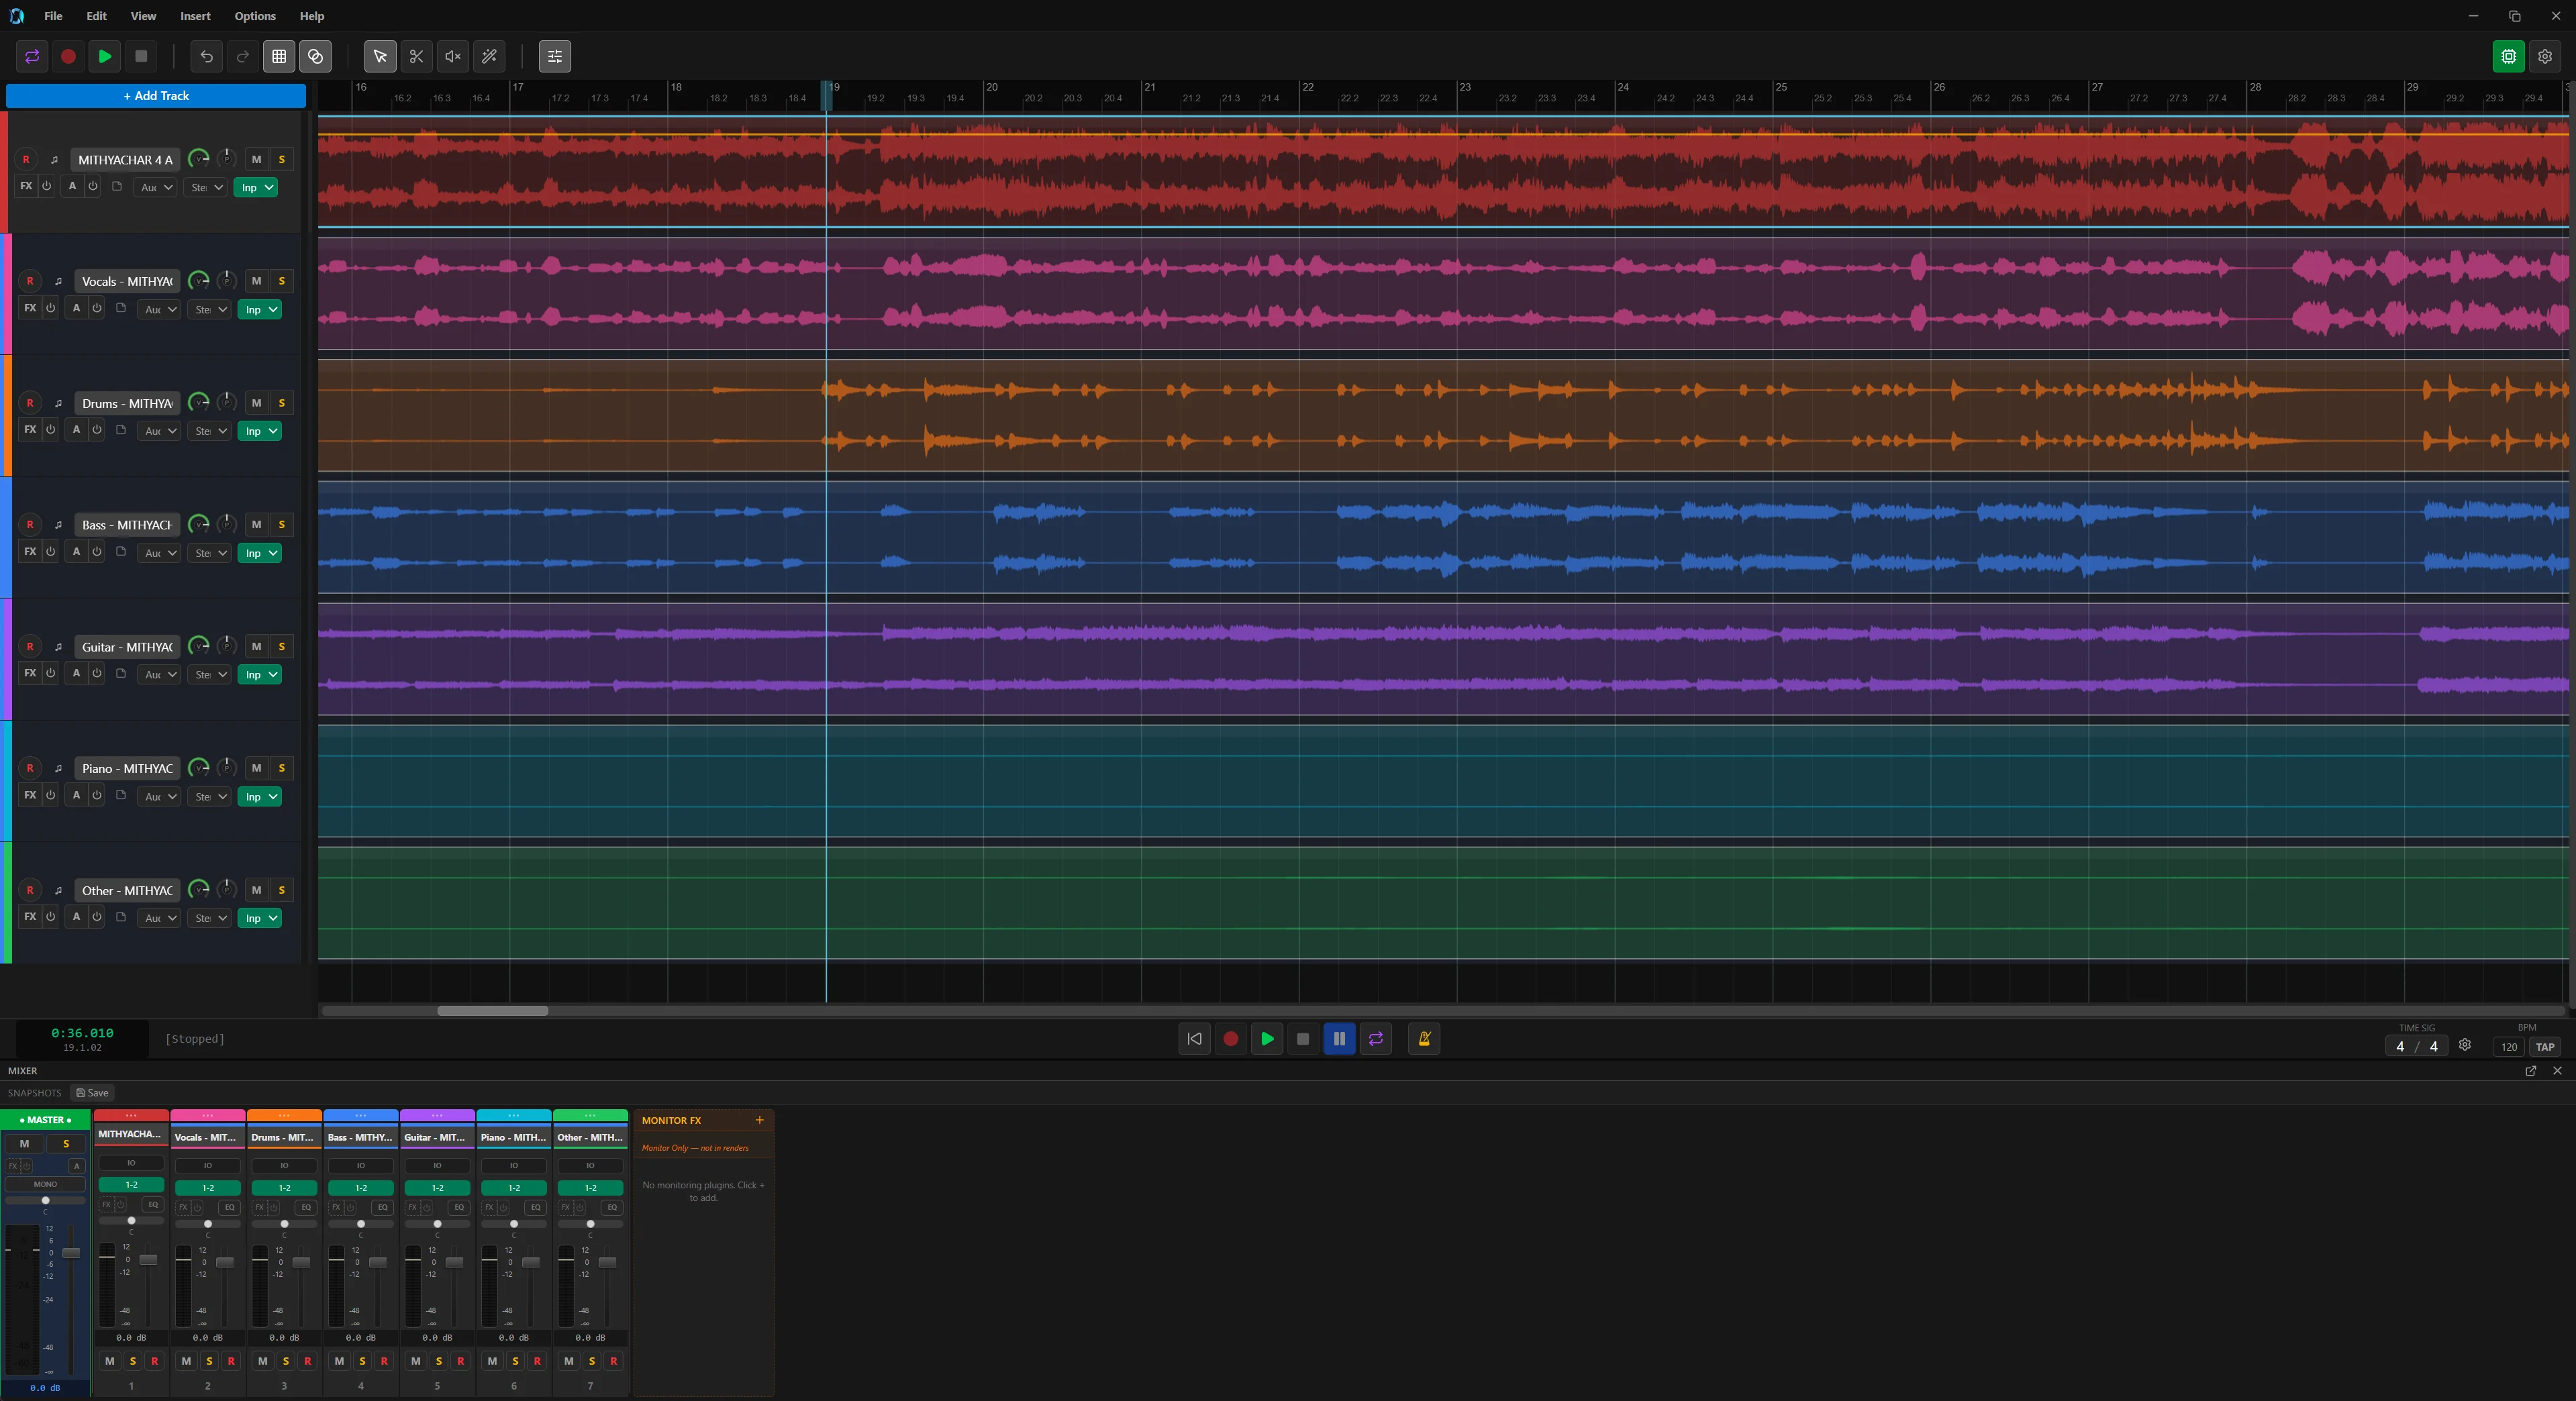
Press F1 at any time for the searchable Help Reference, and Ctrl+Shift+P for the Command Palette, which searches registered app actions without you having to remember a menu location.
Audio device and buffer size
Open View → Audio Settings… or click the gear icon in the main toolbar. Pick your audio system and device, choose a sample rate (44.1 or 48 kHz are standard), and start with a 256-sample buffer. Drop to 128 once you know the machine keeps up; lower buffers mean less latency and more CPU.
Latency, crackle, and driver choice get their own page: Audio setup.
Scan your plugins
Open the FX chain panel on any track (the FX button on the track header) or the Plugin Browser and click Scan. Standard VST3, CLAP, and LV2 directories are scanned and the results are grouped by manufacturer and category.
~/Library/Audio/Plug-Ins/VST3
C:\Program Files\Common Files\VST3
/usr/lib/lv2
VST3 is the most mature path; CLAP and LV2 compatibility varies more by plugin. Nothing showing up? See Plugins & scanning.
Create a project and arm a track
- Press
Ctrl+Tto add an audio track, orCtrl+Shift+Tfor a MIDI track. - Pick the input on the track header and choose stereo or mono.
- Click the record-arm circle. Toggle Monitor to hear the live input through the track's FX chain.
- Add OpenStudio NAM Rack to the FX chain if you are recording guitar or bass, so you hear the tone while you play.
- Press
Ctrl+Rto record andSpaceto stop. The take lands as a clip on the timeline. - Save with
Ctrl+S. Projects use the.osprojextension. Back up older sessions and keep the older app for projects that need conversion.
Prefer to start from a file? Insert → Media file… (or the Insert key) places WAV, AIFF, FLAC, MP3, or OGG audio at the playhead on the selected track.